
When it comes to protecting your basement from moisture, using waterproof paint is crucial. You’ll want to start by evaluating the condition of your walls to identify any existing issues like cracks or mold. Gathering the right tools and materials will set you up for success. As you prepare the surface, remember that proper application is key. Let’s explore the steps you need to take to guarantee lasting protection for your basement.
Key Takeaways
- Assess basement wall conditions by checking for moisture, cracks, and stability before beginning the painting process.
- Gather essential tools and materials, including waterproof paint, brushes, rollers, and safety gear for the job.
- Clean the wall surface thoroughly and repair any cracks or gaps to ensure proper paint adhesion.
- Apply a primer if necessary, then use a roller for large areas and a brush for corners, applying at least two coats.
- Conduct regular maintenance checks every six months to address any issues and preserve the effectiveness of the waterproofing.
Assessing the Condition of Your Basement Walls
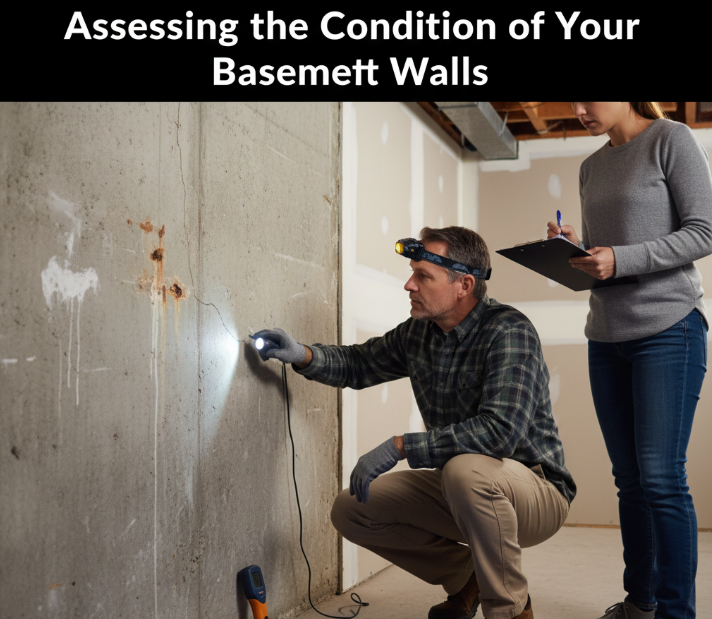
How can you determine if your basement walls are ready for waterproof paint? Start by performing moisture detection; check for damp spots, mold, or peeling paint.
Use a moisture meter to assess the humidity levels in the walls. If you notice any signs of moisture, address those issues first.
Next, evaluate wall stability; verify there are no cracks or structural weaknesses. Tap the walls lightly; a hollow sound may indicate problems behind the surface.
Evaluate the stability of your walls; check for cracks or weaknesses by tapping lightly to detect hollow sounds.
Only when you confirm minimal moisture and solid walls should you proceed with applying waterproof paint for effective protection against future water damage.
Gathering Necessary Tools and Materials
Before you start painting your basement walls, you’ll need to gather a few essential tools and materials.
Make certain you have a checklist that includes recommended paint types, brushes, rollers, and any safety gear like masks and gloves.
Being well-prepared not only streamlines the process but also guarantees a safe and effective application.
Essential Tools Checklist
To successfully apply waterproof paint on your basement walls, you’ll need to gather a specific set of tools and materials that guarantee a smooth process and effective results.
Start with a quality waterproof paint designed to combat basement moisture. Next, grab a paint roller and extension pole for easy application, along with a paintbrush for corners and edges.
Don’t forget a sturdy ladder, painter’s tape, and drop cloths to protect your floors. A paint tray will help you manage your paint efficiently.
Finally, have a sponge or rags handy for cleaning up any spills or drips during the process.
Recommended Paint Types
Selecting the right waterproof paint is essential for protecting your basement walls from moisture and mold.
Look for products specifically labeled as waterproof or water-resistant, such as latex-based or epoxy paints. These options offer excellent waterproof paint benefits, including durability and mildew resistance.
When applying the paint, use a brush for corners and a roller for larger areas to guarantee even coverage.
For the best results, consider using a primer designed for damp surfaces beforehand. This combination of techniques enhances adhesion and prolongs the lifespan of your paint job, keeping your basement dry and comfortable for years to come.
Safety Gear Requirements
When you’re preparing to apply waterproof paint on your basement walls, it’s essential to gather the right safety gear to protect yourself during the process.
Start with a safety gear checklist that includes gloves, goggles, and a mask to prevent inhalation of fumes.
Consider wearing long sleeves and pants to shield your skin from spills. A respirator is a must if you’re working in a poorly ventilated area.
Don’t forget sturdy footwear to protect your feet.
Preparing the Surface for Painting
Before diving into the painting process, it’s essential to prepare the surface of your basement walls properly. Start with surface cleaning; remove dust, dirt, and any mold using a mixture of water and mild detergent. A clean surface guarantees better adhesion for the paint.
Next, inspect for cracks and gaps. If you find any, use a high-quality crack sealing compound to fill them in. This step prevents moisture from seeping through and damaging your paint job.
Once everything’s clean and sealed, let it dry thoroughly before moving on to the next stage. Proper preparation sets the foundation for a successful project.
Choosing the Right Waterproof Paint
Choosing the right waterproof paint is essential for ensuring your basement remains dry and protected from moisture.
Start by exploring different waterproof paint types, such as latex, epoxy, and polyurethane. Each type has unique benefits, so consider your specific needs and environment.
Next, make sure to use proper surface preparation techniques, like cleaning, patching, and priming, to enhance paint adhesion and effectiveness. This step is vital for long-lasting results.
Ultimately, selecting the right paint and ensuring your walls are properly prepared will safeguard your basement against water damage, mold, and mildew, providing you with peace of mind.
Applying a Primer (If Needed)
Although not always necessary, applying a primer can significantly enhance the adhesion and effectiveness of your waterproof paint on basement walls.
Applying a primer can greatly improve the adhesion and performance of waterproof paint on basement walls.
Choose the right primer types based on your wall surface; for example, a latex primer works well on porous surfaces, while an oil-based primer suits masonry.
Before starting the primer application, verify the walls are clean and dry.
Using a roller or brush, apply an even coat, paying attention to corners and edges.
Allow sufficient drying time as per the manufacturer’s instructions.
This step lays a solid foundation for your waterproof paint, guaranteeing long-lasting results and preventing peeling.
Painting the Walls With Waterproof Paint
Once your primer has dried completely, it’s time to paint your basement walls with waterproof paint.
Start by stirring the paint thoroughly to guarantee an even consistency. Use a high-quality roller for large areas, applying the paint in a W pattern for even coverage. For corners and edges, a brush works best.
Remember, waterproof paint benefits include preventing moisture damage and mold growth, extending your wall’s lifespan. Apply at least two coats for ideal protection, allowing each coat to dry according to the manufacturer’s instructions.
Take your time with the application techniques to guarantee a flawless finish you can trust.
Ensuring Proper Drying and Curing Time
To guarantee your waterproof paint performs at its best, you must pay close attention to the drying and curing times specified by the manufacturer.
Drying times can vary considerably, so be sure to consult the product label. Generally, paint might feel dry to the touch within hours, but it requires longer for full adhesion.
The curing process, which can take several days to weeks, ensures the paint bonds effectively with the surface, providing ideal protection.
Avoid rushing this stage; premature use may lead to peeling or damage. Plan your project accordingly to allow sufficient time for both drying and curing.
Inspecting for Missed Spots and Touch-Ups
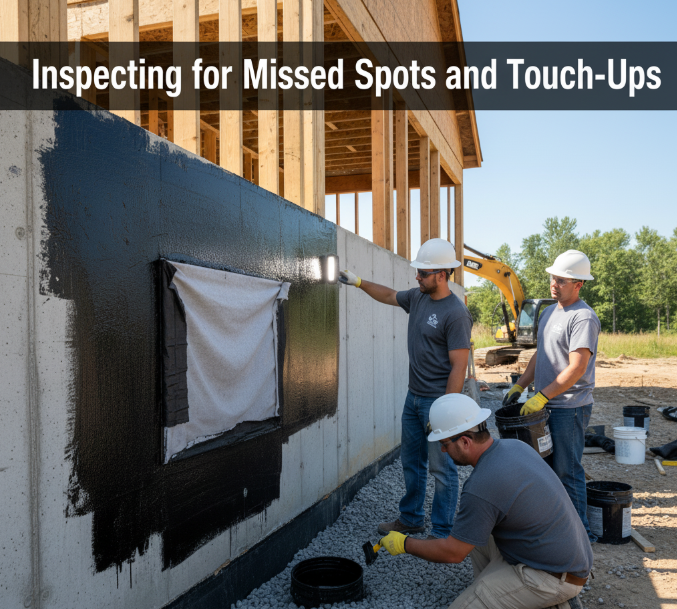
After applying waterproof paint, it’s essential to inspect for missed spots and touch-ups to guarantee a flawless finish.
Look closely at common areas like corners, edges, and behind pipes where paint often gets overlooked.
Identifying any surface imperfections now will allow you to apply effective touch-up techniques, keeping your basement walls protected and looking great.
Common Missed Areas
While applying waterproof paint to your basement walls, it’s easy to overlook certain areas that may lead to future moisture issues.
Focus on common problem areas like the seams where walls meet the floor and around windows. Don’t forget those overlooked corners, which often accumulate dust and moisture.
Use a flashlight to inspect dimly lit spots thoroughly, ensuring you catch any missed patches. After the initial coat dries, perform a detailed check for any spots needing touch-ups.
Addressing these areas now will save you headaches later, keeping your basement dry and protected for years to come.
Identifying Surface Imperfections
Before you start applying waterproof paint, it’s crucial to identify any surface imperfections that could compromise your project.
Examine different surface types in your basement, such as concrete, drywall, or masonry, and look for cracks, flaking, or uneven areas.
Pay close attention to moisture levels, as damp spots can indicate underlying issues needing repair.
Use a flashlight to spot missed areas, especially in corners and behind obstacles.
Don’t skip this step; addressing these imperfections now will guarantee a smooth, long-lasting finish later.
Taking the time to inspect thoroughly will save you headaches down the line.
Effective Touch-Up Techniques
Effective touch-up techniques are essential for ensuring a flawless finish when using waterproof paint on basement walls.
After your initial paint application, inspect the surface for missed spots or uneven coverage. Use a flashlight to highlight imperfections, making them easier to spot.
For touch-ups, use the same brush or roller you applied the paint with to maintain consistency. Apply a thin layer of paint directly onto the missed areas, feathering the edges to blend.
Allow the touch-up to dry completely before evaluating the results. This attention to detail will help you achieve a uniform, professional-looking finish.
Maintaining Your Waterproofed Basement Walls
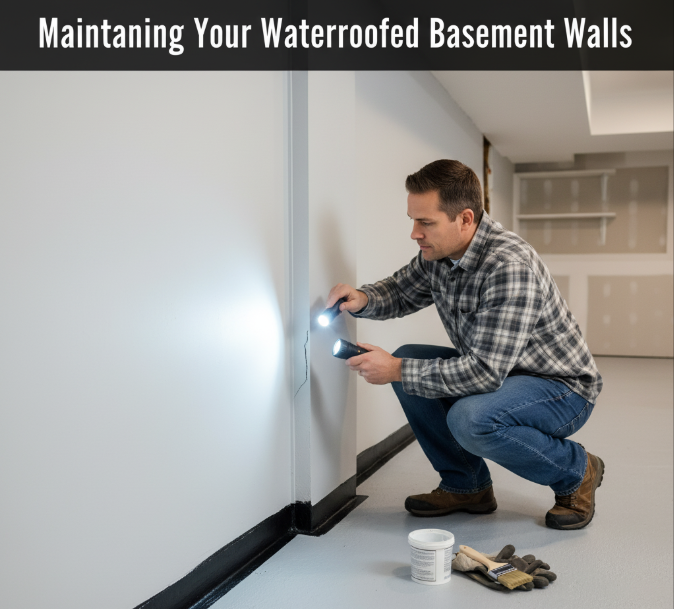
To guarantee your waterproofed basement walls remain effective, regular maintenance is essential.
Implementing preventive measures guarantees moisture control and protects your investment. Here are three key maintenance tips:
- Inspect Regularly: Check for cracks or peeling paint at least every six months. Address any issues immediately to prevent moisture intrusion.
- Clean Surfaces: Use a mild detergent and water to clean walls, removing dust and mold that can compromise the waterproofing.
- Monitor Humidity: Keep humidity levels below 50% using dehumidifiers or proper ventilation to further control moisture and enhance wall durability.
Stay proactive, and your basement walls will stay protected!
Conclusion
By following these steps, you can effectively waterproof your basement walls and protect your home from moisture damage. Did you know that nearly 60% of basements experience some form of water intrusion? This statistic highlights the importance of taking action. With the right preparation and application, you’ll not only enhance your basement’s durability but also increase your property’s value. Regular maintenance will guarantee your investment remains safe and sound for years to come.