
Most homeowners underestimate how easily moisture can seep into their basements, leading to costly repairs down the line. With just a few simple, budget-friendly strategies, you can effectively waterproof your space and protect your belongings. From sealing cracks to improving drainage, there are practical steps you can take today. Curious about the best methods to tackle this issue without breaking the bank? Let’s explore some effective DIY solutions together.
Key Takeaways
- Inspect your basement regularly for dampness, mold, and cracks to identify issues early and prevent costly repairs.
- Seal visible cracks and gaps using silicone sealants for flexibility and moisture resistance, or epoxy for larger cracks.
- Improve drainage by ensuring yard slopes away from the foundation and using simple solutions like downspout extensions.
- Install a sump pump in the lowest part of the basement to prevent flooding and regularly maintain it for optimal performance.
- Utilize waterproofing paint like latex or silicate-based options to create a moisture barrier on basement walls and floors.
Assessing Your Basement’s Vulnerability
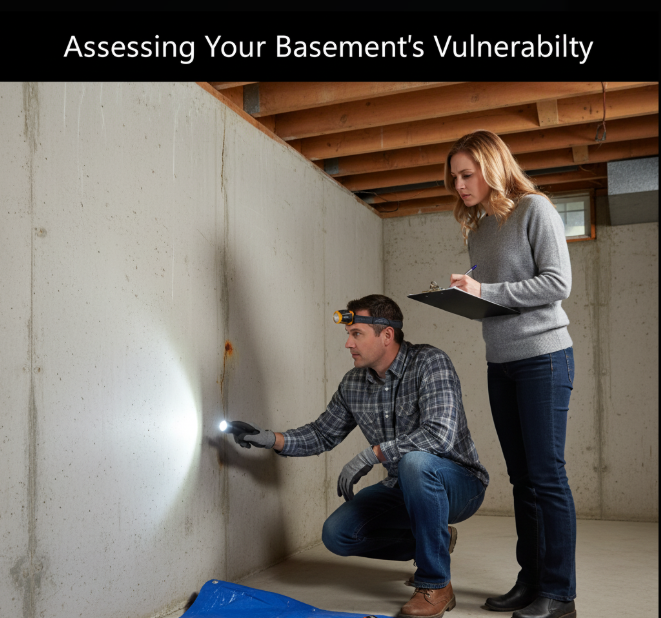
How can you tell if your basement is at risk for water damage? Start with a thorough basement inspection.
Look for signs of dampness, mold, or water stains on walls and floors. Don’t forget to check around windows and pipes, as these are common leak points.
Next, consider moisture testing; using a moisture meter can help you gauge humidity levels accurately. If you find high moisture readings, it’s a clear indication that your basement needs attention.
Regular inspections and testing will help you catch issues early, ensuring your basement stays dry and protected from costly damage down the line.
Sealing Cracks and Gaps
To effectively waterproof your basement, start by identifying any cracks and gaps where water might seep in.
Once you’ve pinpointed these problem areas, choose the right sealants that suit your specific needs.
Proper application techniques will guarantee your efforts pay off, keeping your basement dry and protected.
Identify Problem Areas
As you commence on your basement waterproofing journey, recognizing areas where water can seep in is essential.
Start by inspecting walls, floors, and corners for any visible cracks or gaps. These spots are often hidden moisture sources that lead to water damage if left untreated.
Don’t forget to check around windows and pipes, as these are common entry points for moisture.
Use a flashlight to identify any dampness or discoloration, which may indicate ongoing leaks.
Choose Suitable Sealants
When selecting sealants to effectively waterproof your basement, it’s essential to contemplate the specific materials and conditions of your space.
For cracks and gaps, silicone sealants are a great choice. They’re flexible, durable, and resistant to moisture, making them perfect for areas prone to water exposure.
If you’re dealing with larger cracks, consider epoxy options. These provide a strong bond and can fill deeper gaps, ensuring a robust barrier against water infiltration.
Apply Proper Techniques
While sealing cracks and gaps in your basement, it’s crucial to follow proper techniques to guarantee an effective waterproof barrier.
Start by cleaning the area thoroughly to remove dirt and debris, which can hinder adhesion. Use a high-quality sealant specifically designed for moisture control; apply it generously into cracks, ensuring complete coverage.
For larger gaps, consider using foam backer rods first. Don’t forget to maintain proper basement ventilation to reduce humidity levels, which can further prevent moisture issues.
Improving Drainage Around Your Home
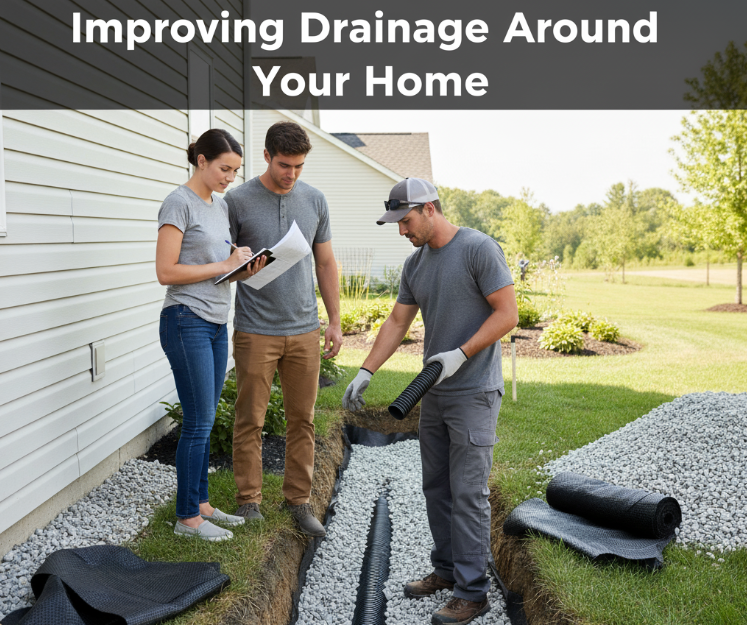
To effectively prevent water from pooling around your home, it’s essential to improve drainage systems in your yard.
Start by evaluating your landscape grading; guarantee that your yard slopes away from the foundation. This simple adjustment directs water flow and reduces the risk of basement flooding.
Consider implementing drainage solutions like French drains or downspout extensions to channel rainwater far from your home. You can also add gravel beds or rain gardens to absorb excess moisture.
Installing a Sump Pump
After enhancing your yard’s drainage, consider installing a sump pump for added protection against basement flooding.
A sump pump installation is straightforward; you’ll need a sump basin and a reliable pump. Start by digging a hole in the lowest part of your basement, place the basin, and connect the pump. Make sure to set up a discharge line away from your foundation.
Once installed, regular sump pump maintenance is essential. Check the pump every few months, ensuring it’s free of debris and the float switch operates smoothly.
This proactive approach keeps your basement dry and protects your home from water damage.
Utilizing Waterproofing Paint
When it comes to waterproofing your basement, using the right paint can make all the difference.
You’ll find various types of waterproofing paint, each with unique benefits, along with effective application techniques to guarantee a durable seal.
Plus, there are cost-effective options that won’t break the bank while keeping your basement dry.
Types of Waterproofing Paint
Waterproofing paint plays an essential role in protecting your basement from moisture damage. There are various types to choose from, each with unique waterproofing formulations.
For example, latex-based paints offer flexibility and breathability, while epoxy coatings provide exceptional paint durability and resistance to harsh conditions. Silicate-based paints penetrate concrete surfaces, creating a waterproof barrier.
Choose the right type based on your basement’s needs and the level of moisture exposure. Remember, selecting a high-quality waterproofing paint guarantees effective moisture protection and long-lasting results, ultimately saving you time and money in the long run.
Application Techniques Explained
Applying waterproofing paint effectively can make all the difference in keeping your basement dry. Start with a clean, dry surface to guarantee proper adhesion.
For corners and tight spots, use a brush application to reach every nook. Then, switch to a roller technique for larger areas, which saves time and provides an even coat.
Apply in thin layers, allowing each coat to dry completely before adding the next. Watch for drips and smooth them out immediately.
This method not only enhances waterproofing but also gives your basement a neat finish. With these techniques, you’re well on your way to a dry space!
Cost-Effective Options Available
After mastering the application techniques, it’s time to contemplate your budget for waterproofing your basement.
Utilizing waterproofing paint is one of the most cost-effective options available. Look for budget materials specifically designed for basement walls; they often contain additives that enhance their moisture resistance.
With some research, you can find DIY solutions that won’t break the bank. Simply prepare the surface, apply the paint, and let it cure properly.
Creating a Moisture Barrier
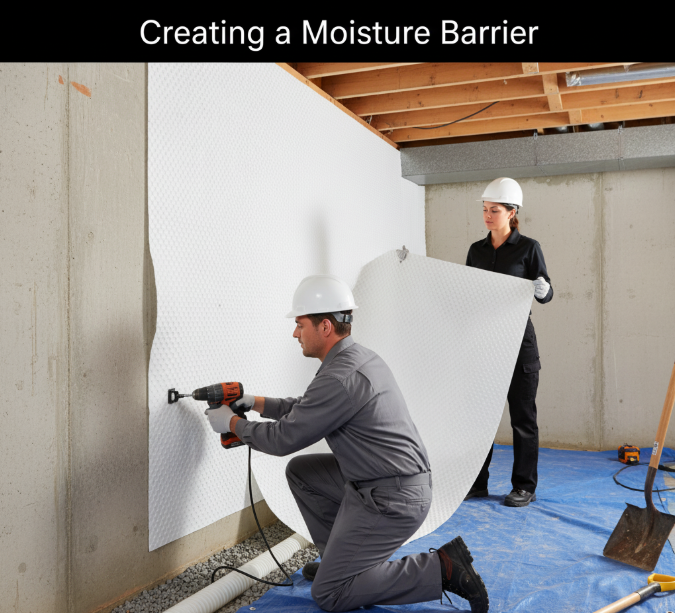
Creating a moisture barrier is essential for keeping your basement dry and protected from water damage. Start with thorough surface preparation; clean walls and floors to eliminate dirt and loose materials.
Next, choose a suitable waterproofing paint or membrane that minimizes moisture retention. Apply it evenly, ensuring full coverage to prevent leaks. Don’t forget to pay attention to corners and seams, as these are often weak points.
Allow the barrier to cure completely before exposing it to moisture. With a solid moisture barrier in place, you’ll greatly reduce the risk of water damage and maintain a healthier basement environment.
Conclusion
By taking these simple, cost-effective steps, you can markedly reduce the risk of water damage in your basement. Imagine the relief of knowing your space is protected from moisture, preventing mold and costly repairs. Don’t wait for a rainy day to discover leaks; be proactive in safeguarding your home. With a little effort and the right tools, you can enjoy a dry, healthy basement, giving you peace of mind and a space that’s truly yours.