
Imagine stepping into your basement and feeling a damp chill in the air, a clear sign that water might be creeping in. You don’t need a sump pump to tackle this problem; there are effective DIY methods to keep your space dry. From sealing cracks to improving drainage around your home, you can take control of the situation. Let’s explore practical steps to create a waterproof barrier and protect your basement from unwanted moisture.
Key Takeaways
- Inspect your basement regularly for signs of moisture, mold, and water damage to catch issues early on.
- Seal all visible cracks and gaps in walls and floors using appropriate masonry crack fillers and flexible sealants.
- Improve drainage around your home by ensuring proper landscape grading and installing drainage solutions like French drains if needed.
- Apply interior waterproofing solutions, including wall sealants and drainage systems, to create a moisture barrier and redirect water.
- Use dehumidifiers to maintain ideal humidity levels and enhance ventilation with exhaust fans or open windows.
Assessing Your Basement for Water Issues

When it comes to evaluating your basement for water issues, you’ll want to start by looking for signs of moisture or water damage.
Create an inspection checklist that includes key areas like walls, floors, and corners. Check for puddles, damp spots, or mold growth. Pay attention to potential water sources, such as leaky pipes or groundwater seepage.
Inspect walls, floors, and corners for moisture, puddles, and mold to identify potential water sources like leaky pipes.
Don’t forget to inspect windows and doors for proper sealing. If you find any issues, note them down for future reference.
Regular inspections help you catch problems early, preventing costly damage and ensuring your basement remains dry and functional.
Sealing Cracks and Gaps
After identifying moisture issues during your inspection, the next step is sealing cracks and gaps in your basement.
Start by locating all visible cracks in the walls and floors. Use crack fillers specifically designed for masonry to effectively seal these openings.
For gaps around windows and doors, opt for flexible gap sealing materials that can accommodate movement and prevent water intrusion. Clean the areas before application to guarantee a strong bond.
Once filled, smooth the surface for a neat finish. This process not only blocks moisture but also improves your basement’s overall insulation, making it an essential step in waterproofing.
Improving Drainage Around Your Home
Effective drainage around your home is essential for keeping your basement dry and preventing future moisture problems.
Start by evaluating your landscape grading; the ground should slope away from your foundation. Aim for a slope of at least 6 inches within the first 10 feet.
Consider installing drainage solutions like French drains or downspout extensions to direct water away. Clear gutters regularly to prevent overflow, and use permeable materials for walkways to allow rainwater absorption.
Installing Interior Waterproofing Solutions

To effectively waterproof your basement, you’ll want to start by applying wall sealants to create a barrier against moisture.
Next, consider installing a drainage system to redirect water away from your walls and foundation.
These steps are essential for preventing leaks and keeping your basement dry.
Wall Sealants Application Techniques
When tackling wall sealants for interior waterproofing, you’ll want to follow a well-defined process to guarantee maximum effectiveness.
Start by selecting the right sealant types, such as liquid, paint-on, or adhesive membranes. Clean the surface thoroughly, removing any dirt or loose materials.
For application methods, use a brush or roller for liquid sealants, ensuring even coverage. If using an adhesive membrane, carefully align and press it against the wall.
Allow adequate curing time as per the manufacturer’s instructions. Finally, inspect your work to confirm a uniform seal, ensuring your basement remains dry and protected from moisture intrusion.
Drainage System Installation Steps
Installing a drainage system in your basement is essential for preventing water accumulation and potential damage.
Start by choosing appropriate drainage types, like interior French drains or channel drains, based on your basement’s needs. Next, mark the area for trench installation, ensuring it runs along the perimeter of your basement.
Dig the trench at least 12 inches deep and wide enough to accommodate your chosen drainage system. Lay gravel at the bottom for proper drainage flow, then place the drain pipe with the perforations facing down.
Finally, cover the pipe with more gravel and replace the soil to complete your installation.
Using Dehumidifiers and Ventilation
To keep your basement dry, you’ll want to strategically place dehumidifiers to capture excess moisture effectively.
Understanding proper ventilation techniques is equally important, as they help circulate air and reduce humidity levels.
Regularly monitoring humidity levels will guarantee your efforts are working and help you maintain a comfortable environment.
Optimal Dehumidifier Placement
Where should you place your dehumidifier to maximize its effectiveness? Start by positioning it in the dampest areas of your basement, usually near walls that show moisture.
For larger spaces, consider using multiple dehumidifier types, such as a portable unit for small areas and a whole-house system for expansive basements.
Verify there’s at least a few feet of clearance around the unit to allow for proper airflow.
Set your dehumidifier to ideal settings, typically between 30-50% humidity, to efficiently reduce moisture levels.
Regularly check and empty the water reservoir to maintain peak performance.
Ventilation Techniques Explained
While effective dehumidification is essential for managing moisture in your basement, proper ventilation techniques can greatly enhance the overall environment.
To improve air circulation, consider installing exhaust fans or opening windows when weather permits. This helps to expel humid air and replace it with drier outdoor air.
Additionally, strategically placing your dehumidifier near vents can maximize moisture control. Use ceiling fans to promote airflow, ensuring that the air moves freely throughout the space.
Regularly check for any blockages in vents or ducts to maintain ideal ventilation. These techniques work together to create a healthier, dryer basement environment.
Monitoring Humidity Levels
Monitoring humidity levels is essential for keeping your basement dry and preventing mold growth. To achieve effective humidity control, consider using dehumidifiers and ensuring proper ventilation. Regularly check moisture detection levels with a hygrometer to maintain the ideal range of 30-50% humidity.
| Device | Purpose | Recommended Humidity Level |
|---|---|---|
| Dehumidifier | Reduces moisture | 30-50% |
| Ventilation Fan | Improves airflow | 30-50% |
| Hygrometer | Monitors humidity | 30-50% |
Regular Maintenance and Monitoring Tips
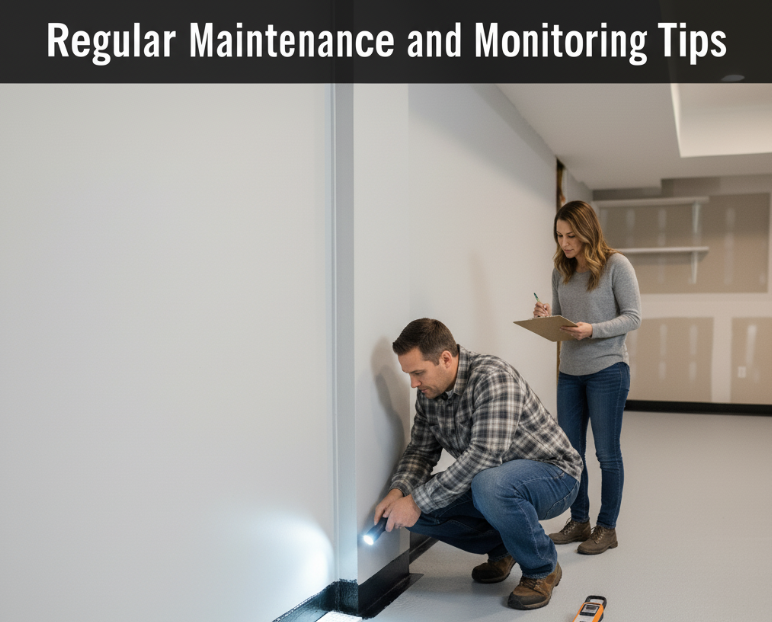
To keep your basement waterproof and free from moisture issues, regular maintenance and monitoring are essential.
Schedule routine inspections every few months to check for cracks in walls and floors, as well as signs of water infiltration. Use a moisture detection tool to identify any damp areas; early detection can save you from bigger problems.
Verify gutters and downspouts direct water away from your foundation, and keep window wells clean. Regularly inspect and maintain your drainage systems to prevent clogs.
Conclusion
By taking these proactive steps, you can effectively waterproof your basement without a sump pump. Assess the space for vulnerabilities, seal any cracks, improve drainage, and implement interior solutions. Use dehumidifiers to control moisture and guarantee proper ventilation to maintain a healthy environment. Regular maintenance and monitoring are key to preventing future water issues. With diligence and care, you’ll create a dry, safe, and welcoming basement for years to come.