
If you’re facing issues with moisture in your basement, waterproofing the walls can be a straightforward DIY project. You’ll need to assess the walls for cracks and gather the right tools and materials. Cleaning the surface and making necessary repairs will set the stage for effective waterproofing. Ready to take the next step in protecting your home from water damage? Let’s explore the essential process you can follow to achieve lasting results.
Key Takeaways
- Assess basement walls for cracks, damp spots, and mold to understand necessary repairs and waterproofing efforts.
- Gather essential tools and materials like sealants, brushes, and safety gear for an efficient waterproofing process.
- Clean walls thoroughly using a stiff brush and a mild detergent solution to ensure good adhesion for waterproofing materials.
- Repair any visible cracks with appropriate methods such as epoxy filler for hairline cracks or hydraulic cement for larger ones.
- Apply a suitable waterproofing sealant evenly, allowing it to dry completely before applying a second coat for effective protection.
Assess the Condition of Your Basement Walls
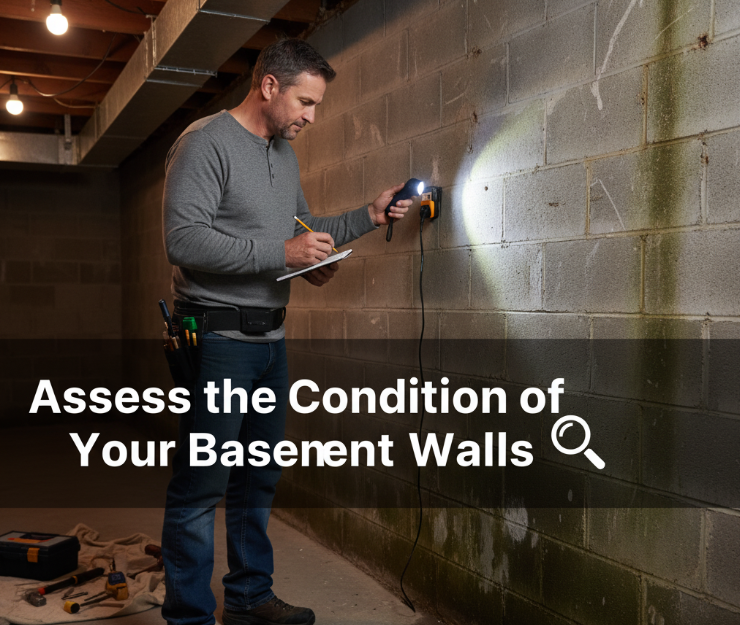
Before you plunge into waterproofing your basement walls, it’s essential to evaluate their condition.
Start by inspecting the wall materials for cracks, peeling paint, or damp spots. These signs indicate moisture sources that could lead to further issues. Look for areas where water might be entering, like windows, joints, or foundation cracks.
Don’t forget to check for mold, as it can compromise your walls and overall air quality. Understanding the extent of any damage will guide your waterproofing efforts.
Gather Necessary Tools and Materials
To effectively waterproof your basement walls, you’ll need to gather the right tools and materials.
Start with your tool selection; a paint roller, brush, and caulking gun are essential. You’ll also need a concrete sealer, waterproofing paint, and caulk for any cracks.
Begin with essential tools: a paint roller, brush, and caulking gun, along with concrete sealer and waterproofing paint.
For material sourcing, check local hardware stores or online retailers to find high-quality products that suit your project’s needs.
Don’t forget safety gear like gloves and goggles.
With the right tools and materials in hand, you’ll be well-prepared to tackle the waterproofing process efficiently and effectively, ensuring your basement stays dry for years to come.
Clean the Basement Walls Thoroughly
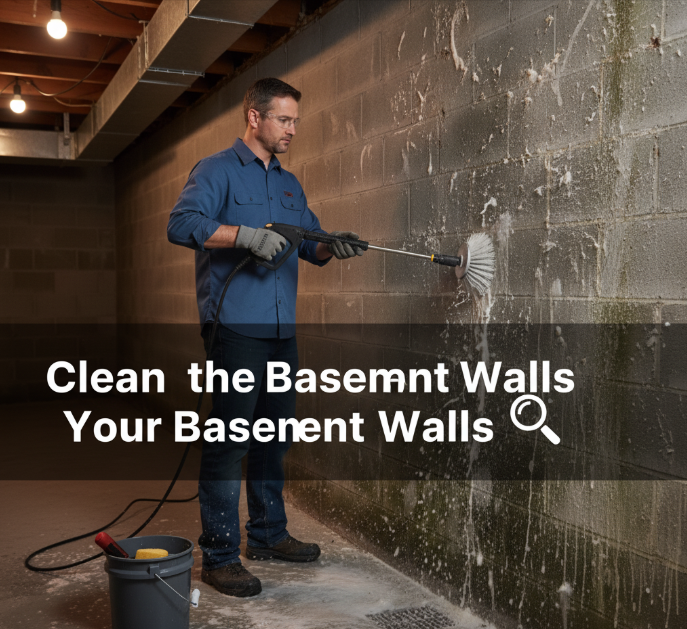
Start by cleaning your basement walls thoroughly to guarantee the waterproofing materials adhere properly.
Begin with a stiff brush to remove dirt, dust, and any loose debris. For mold prevention, mix water with a mild detergent or vinegar and scrub the walls, ensuring you get into any crevices.
Rinse with clean water and let the walls dry completely. This step is essential not only for proper adhesion but also for maintaining good wall insulation. A clean surface prevents moisture buildup and keeps your basement dry.
Once your walls are clean and dry, you’ll be ready for the next steps in the waterproofing process.
Repair Any Cracks or Damage
Now that your walls are clean, it’s time to inspect for any visible cracks or damage.
Look closely for any gaps that could let water in, and be sure to address them promptly.
Using the right sealants will help you effectively waterproof your basement and prevent future issues.
Inspect for Visible Cracks
Before you begin waterproofing your basement walls, it’s essential to inspect for visible cracks and signs of damage. Effective crack detection is vital for ensuring a long-lasting waterproof barrier. Look for hairline fissures and larger cracks, as they can lead to water infiltration. Once you identify any issues, use appropriate repair techniques to fix them before proceeding.
| Crack Type | Repair Technique |
|---|---|
| Hairline Cracks | Use epoxy filler |
| Small Cracks | Apply hydraulic cement |
| Large Cracks | Install crack injection |
| Surface Flaws | Patch with cement mix |
Addressing these cracks will enhance your waterproofing efforts.
Use Appropriate Sealants
Once you’ve repaired any visible cracks, it’s time to focus on applying the right sealants to create a waterproof barrier.
Start by selecting appropriate sealant types, like liquid rubber or epoxy, which effectively bond to concrete surfaces. Clean the area thoroughly before application to guarantee proper adhesion.
Use a caulking gun for precise application, filling cracks and gaps evenly. For larger areas, consider using a paint roller for an even coat.
Allow adequate drying time as specified on the product label. With the right techniques, you’ll secure your basement walls against moisture, keeping your space dry and protected.
Apply Waterproofing Sealant
Now that you’ve repaired any cracks, it’s time to apply a waterproofing sealant.
Start by choosing the right sealant for your basement’s specific needs and prepare the surface thoroughly.
Then, apply the sealant evenly and carefully to guarantee maximum protection against moisture.
Choose the Right Sealant
Choosing the right waterproofing sealant is essential for effectively protecting your basement walls from moisture damage.
Start by understanding sealant types, such as liquid rubber, epoxy, or silicone. Each type has unique benefits, so consider your specific needs and wall conditions. For example, liquid rubber works well for large areas, while epoxy is great for cracks.
Next, think about sealant applications; some are better suited for interior use, while others excel outdoors. Make certain the sealant you select can withstand the moisture levels in your basement.
This choice will guarantee long-lasting protection and peace of mind.
Prepare the Surface
After selecting the right sealant, it’s important to prepare the surface of your basement walls for application.
Proper surface preparation is essential for effective moisture control. Follow these steps to get started:
- Clean the Walls: Remove dust, dirt, and any mildew using a scrub brush and a cleaning solution.
- Repair Cracks: Fill in any cracks or holes with a suitable patching compound.
- Dry the Surface: Verify the walls are completely dry before applying the sealant.
- Check for Moisture: Use a moisture meter to confirm the wall’s dryness.
Apply Evenly and Carefully
To achieve ideal results when applying waterproofing sealant, start by using a brush or roller for even coverage.
Make sure your surface preparation is thorough; any dust or debris can compromise the sealant’s effectiveness.
Apply the sealant in smooth, overlapping strokes, ensuring you coat every inch.
Use application techniques that promote uniformity, like working in small sections to prevent drying before you’re finished.
Don’t rush—take your time to inspect your work as you go.
After the initial coat, allow it to dry completely before applying a second layer for maximum protection against moisture.
Install a Drainage System (If Needed)
Installing a drainage system can be essential for preventing water damage in your basement.
Installing a proper drainage system is crucial for safeguarding your basement against water damage.
To effectively manage excess water, consider these drainage options:
- Interior French Drains: Install around the perimeter to redirect water flow.
- Sump Pump: Place it in a pit to remove accumulated water and keep your basement dry.
- Exterior Drainage Systems: Grade your yard to guarantee water flows away from the foundation.
- Downspout Extensions: Direct rainwater away from the basement walls to minimize moisture.
Implementing these strategies will help protect your basement and enhance your waterproofing efforts.
Monitor and Maintain Your Waterproofing Efforts
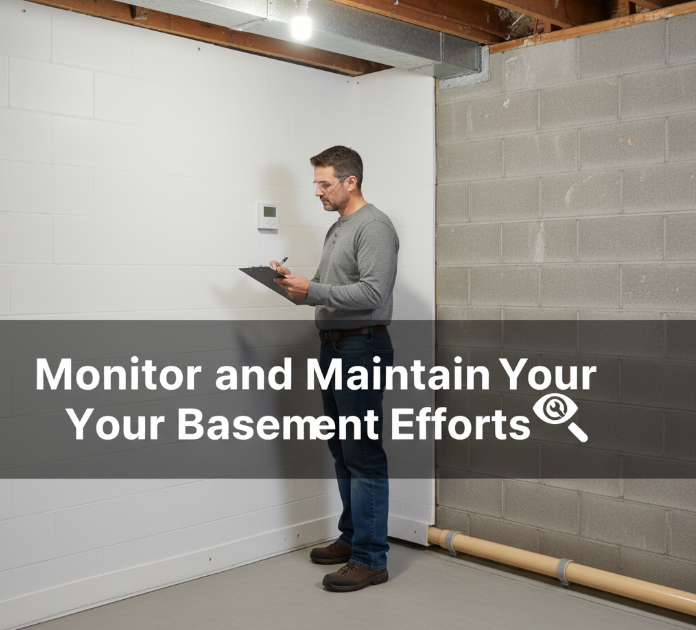
Once you’ve set up your drainage systems to combat water issues, it’s important to regularly monitor and maintain your waterproofing efforts.
Start by checking for signs of moisture buildup on your walls and floors. Schedule inspections every few months to guarantee your waterproofing materials remain intact and effective.
Look for cracks, peeling paint, or mold growth, and address these issues immediately. Additionally, keep an eye on your drainage systems to ensure they’re functioning properly.
Conclusion
By following these steps, you’re not just protecting your basement—you’re creating a fortress against moisture’s relentless siege. With each brushstroke of sealant, you’re weaving a shield that stands between your home and the damp darkness outside. Regular monitoring transforms your efforts into a proactive defense, ensuring your sanctuary remains dry and safe. Embrace this journey, and let your basement become a haven, free from the shadows of water intrusion. Your hard work will pay off, keeping your space secure for years to come.