
Many homeowners believe that basement waterproofing is an intimidating task best left to the professionals, but that’s not necessarily true. With the right approach and tools, you can effectively tackle this project on your own. First, you need to assess your basement for any water issues and gather the necessary materials. But what steps should you take to guarantee a successful waterproofing job? Let’s explore the practical process together.
Key Takeaways
- Inspect the basement for water damage, mold, and cracks, noting any areas needing attention before starting the waterproofing process.
- Clear out the space, removing furniture and debris, and clean the floors thoroughly to prepare for waterproofing.
- Seal all visible cracks and gaps with high-quality sealant, ensuring surfaces are clean for effective adhesion.
- Apply waterproofing products like membranes or sealants, using appropriate methods for your specific basement size and layout.
- Allow materials to cure as per manufacturer instructions and maintain good ventilation during the process to enhance effectiveness.
Assessing Your Basement for Water Issues
How can you tell if your basement has water issues? Start by checking for visible signs of water damage, like stains or mold on walls.
Pay attention to damp odors; they often signal moisture problems. Use a moisture detection meter to measure humidity levels in the air and on surfaces.
Inspect the floor for cracks or puddles, especially after heavy rain. If you notice condensation on windows or walls, that’s another red flag.
Gathering Necessary Tools and Materials
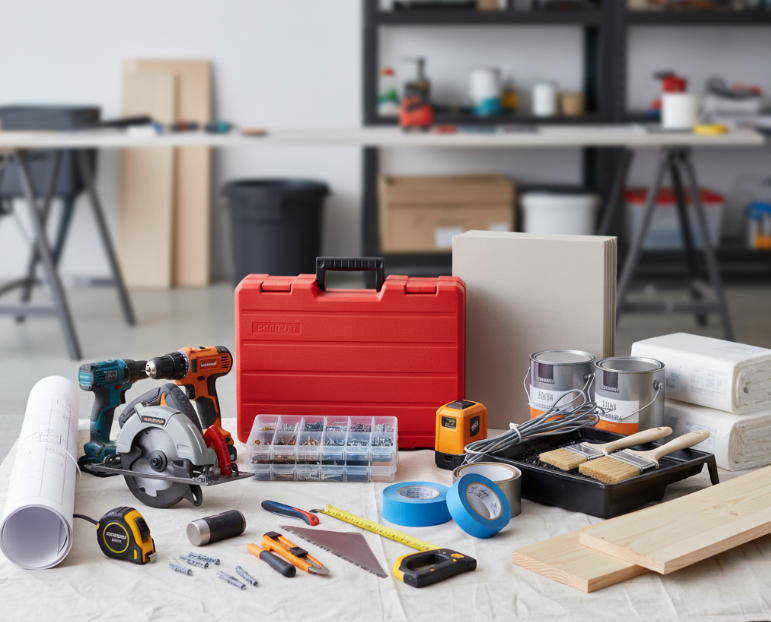
Before diving into your basement waterproofing project, it’s essential to gather the right tools and materials. You’ll need tool types like a trowel, caulking gun, and a paintbrush for applying sealants.
Gather essential tools like a trowel, caulking gun, and paintbrush before starting your basement waterproofing project for optimal results.
Don’t forget a wet/dry vacuum for cleanup and a moisture meter to monitor humidity levels.
For materials, consider waterproof sealants, drainage mats, and crack fillers. You can find these at local hardware stores or online material sources like home improvement retailers.
Having everything ready guarantees a smooth process and helps you tackle any issues effectively. Proper preparation is key to achieving a dry, waterproof basement.
Preparing the Basement for Waterproofing
Once you’ve gathered all the necessary tools and materials, it’s time to prepare your basement for waterproofing.
Start by clearing out the space—remove any furniture, boxes, and debris. Next, inspect the floors for any damage and clean them thoroughly, making sure they’re free of dust and grime. This floor preparation is essential for effective waterproofing.
After that, consider choosing colors for any paint or sealant you plan to use. Light colors can make the space feel larger and brighter.
Finally, guarantee proper ventilation while you work, as this will help the materials cure properly and maintain a safe environment.
Sealing Cracks and Gaps
To effectively seal cracks and gaps in your basement, start by identifying problem areas where water might enter.
Look for visible cracks in the walls and floor, as well as gaps around windows and pipes.
Once you’ve pinpointed these vulnerabilities, apply a high-quality sealant properly to guarantee a watertight barrier.
Identify Problem Areas
As you tackle basement waterproofing, identifying problem areas like cracks and gaps is essential for preventing water intrusion.
Start with leak detection by inspecting walls and floors for visible cracks. Pay attention to corners and joints, as these are common moisture sources. Use a flashlight to check dark corners or behind appliances where water may hide.
Don’t forget to look at the exterior foundation for any signs of damage. Mark any problematic areas for further attention.
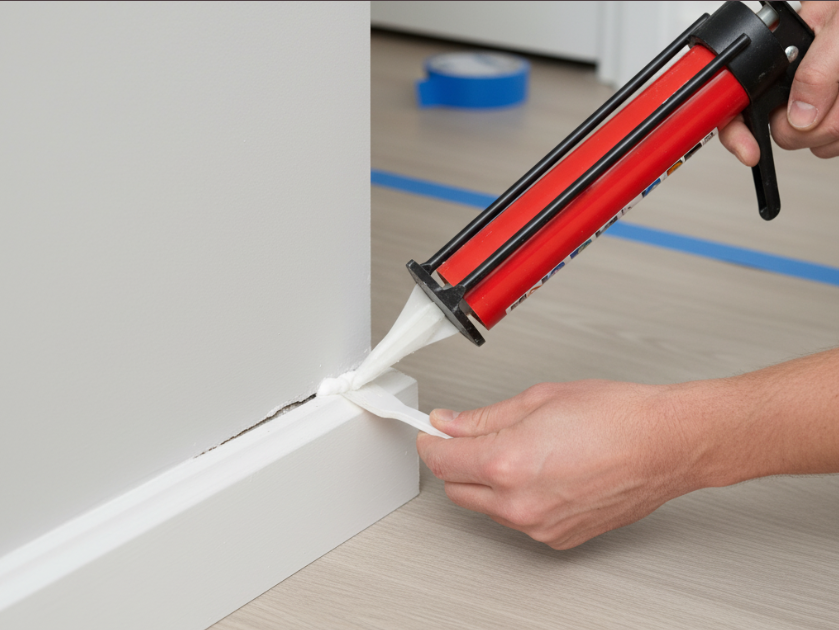
Apply Sealant Properly
While you may have identified the cracks and gaps in your basement, applying sealant properly is crucial for effective waterproofing.
Start by choosing the right sealant types, like polyurethane or epoxy, based on the size and location of the cracks. Clean the surfaces to remove dust and debris before application.
Use a caulking gun to apply the sealant evenly, guaranteeing it fills the gaps completely. Smooth the surface with a putty knife for a neat finish.
Finally, allow adequate curing time as specified by the manufacturer—typically, 24 to 72 hours—before exposing it to moisture. This guarantees a durable seal.
Applying Waterproofing Products
Choosing the right waterproofing materials is essential for effective basement protection, so take your time to research options like sealants, paints, and membranes.
Once you’ve selected the right product, applying it correctly is key to ensuring a watertight barrier.
We’ll cover the best techniques to help you achieve a successful application and keep your basement dry.
Selecting Waterproofing Materials
When it comes to selecting waterproofing materials for your basement, understanding your options can make all the difference.
Start by considering waterproofing membranes, which create a barrier against moisture. These come in various types, including liquid, sheet, and foam membranes, each suited for different applications.
Next, think about drainage systems; these help redirect water away from your foundation, preventing buildup. Popular choices include interior and exterior drainage systems, which can greatly reduce moisture levels.
Assess your basement’s specific needs and local climate conditions to choose the most effective materials, ensuring a dry and safe space for years to come.
Application Techniques Explained
Applying waterproofing products effectively requires careful preparation and attention to detail. You’ll want to verify your surface is clean and dry before starting.
Here are some key application methods to take into account:
- Brush Application: Ideal for small areas or corners.
- Roller Application: Great for larger surfaces, providing even coverage.
- Spray Application: Fast and effective for extensive areas, but requires protective gear.
Always follow the manufacturer’s instructions for the best results.
Remember, thorough surface preparation is vital; any dirt or moisture can compromise the waterproofing effectiveness.
Take your time, and you’ll achieve a long-lasting, protective barrier against water intrusion.
Maintaining Your Waterproofed Basement
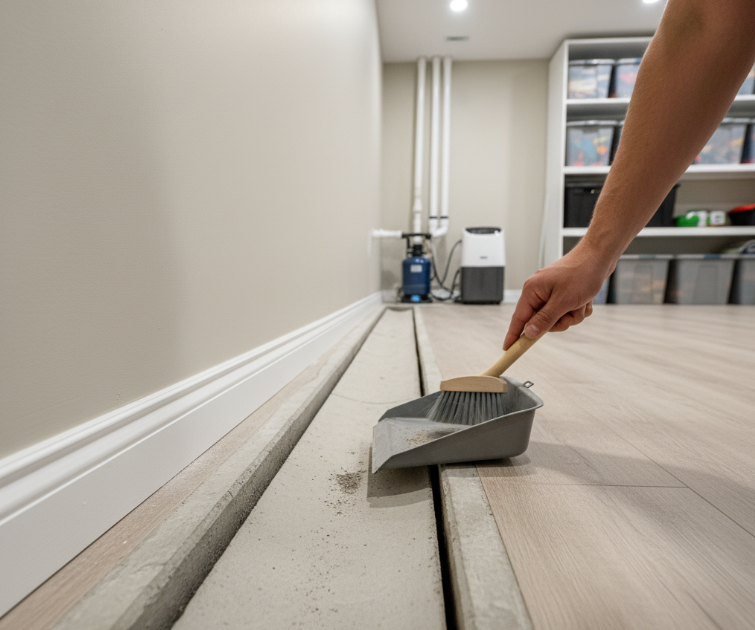
Although you’ve successfully waterproofed your basement, maintaining that protection is essential for long-term effectiveness.
Start with routine inspections every few months to check for cracks, mold, or damp spots. Pay close attention to areas near windows and walls.
Routine inspections every few months are crucial to identify cracks, mold, or damp spots, especially near windows and walls.
Make certain gutters and downspouts direct water away from your foundation to enhance moisture control. Monitor humidity levels and consider using a dehumidifier if necessary.
Regularly clean sump pumps and drainage systems to prevent clogs. Address any signs of water intrusion immediately, and keep an eye on landscaping around your home.
Conclusion
By taking these steps to waterproof your basement, you’re not just protecting your home; you’re fortifying a sanctuary against the relentless tide of moisture. Like a sturdy dam holding back a river, your efforts will create a dry haven for you and your family. Regular maintenance will be the key to preserving this fortress, ensuring that your basement remains a safe refuge for years to come. Embrace this task, and let your home flourish in a moisture-free environment.